No matching locations. Try another filter.
container · Base Camp●
Base Camp Container
GRID 644, 158
Beside the radio mast.
Access: Cross the bridge from camp.
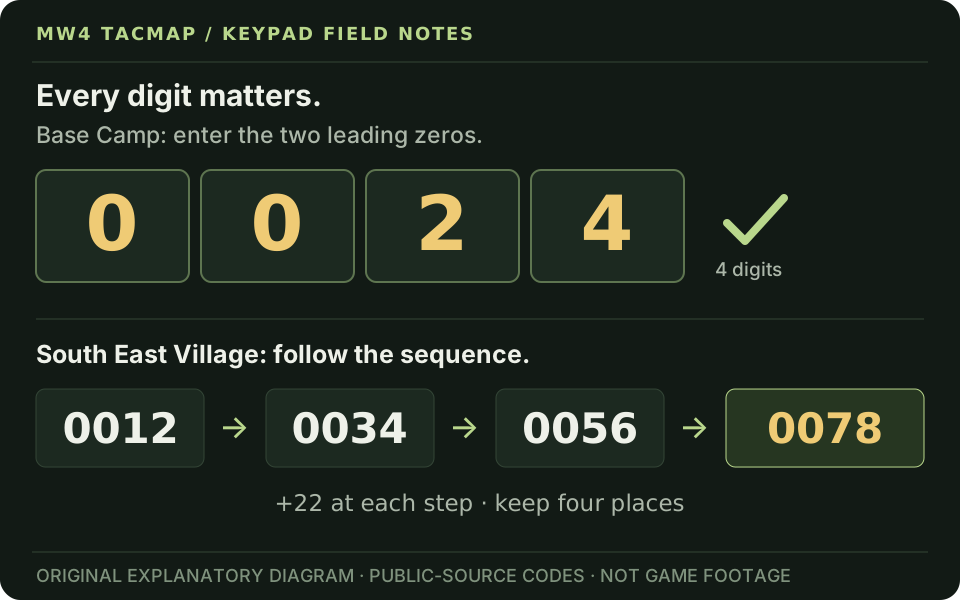
Clue: Continue the six-step sequence; preserve four digits.
Reported contents: Supplies and container-location intel; no yellow-crate credit reported.
container · Northeast●
South of Jamming Station
GRID 667, 125
Near the tower and truck.
Access: Approach south of the station.
Clue: 5903 → 6805 → 7707 → 8609: add 902.
Reported contents: Yellow supply crate; contents vary.
container · Southeast●
South East Village
GRID 652, 187
Village near the bridge.
Access: Find the red roadside sign.
Clue: 0012 → 0034 → 0056 → 0078: add 22.
Reported contents: Yellow supply crate; contents vary.
container · Base Camp!
Cliff Near Base Camp
No reliable fixed coordinate
Cliffside container north of camp. Guides disagree: 646,149 or 646,158. No precise pin is shown.
Access: Look uphill beside the truck.
Clue: 9300 → 6400 → 3500 → 0600: subtract 2900.
Reported contents: Yellow supply crate; contents vary.
container · River●
Big Sign Container
GRID 634, 136
Beside the large riverside sign.
Access: Follow the river road.
Clue: 1000 → 1200 → 1230 → 1234: fill the next digit.
Reported contents: Yellow supply crate; contents vary.
container · River●
Small Island Container
GRID 618, 132
River island near a watchtower.
Access: Reach the island by swimming.
Clue: 3456 → 4567 → 5678 → 6789. The reported 6788 variant breaks this sequence.
Reported contents: Yellow supply crate; contents vary.
Hidden bunker · River●
Farm Field Hidden Bunker
GRID 631, 127
Keypad in the farm field.
Access: Open the hatch; check the radio desk.
Clue: 10 + 20 + 100 + 200 = 330; enter 0330.
Reported contents: Supplies and a second bunker note; no yellow-crate credit reported.
Hidden bunker · River●
Island Hidden Bunker
GRID 615, 169
Riverbank hatch below the bridge. The entrance is reported at 615,169; the nearby interior crate at 616,168.
Access: Find the hatch by the cliff.
Clue: River checkpoint numbers 1 + 2 + 5 = 8; enter 0008. Some guides call this an outpost count.
Reported contents: Yellow supply crate and bunker note.
How the keypad puzzles work
The published solutions use clues near each lock: a date or clock, a count, or a digit sequence. Inspect the immediate area before entering the code. Codes are four-character strings: keep the leading zeros in 0024, 0078, 0600, 0330 and 0008.
The bunker keypads sit behind exploration or traversal steps. A correct code does not replace finding the entrance. Read the access note on each card and use the coordinate schematic as a reference, then match landmarks in the game.
Frequently asked questions
Are these codes independently tested in the game?
No. The eight code values match multiple published guides. This site has not performed a gameplay test. Source matches, single-source reports and coordinate conflicts are labeled separately.
Do I need to enter the zeros?
Yes. Enter all four digits exactly as displayed. The site preserves codes as text, so 0024 is never shortened to 24.
Why do two guides give different coordinates?
Some articles place a keypad, the surrounding landmark or a collectible at different points. We retain a coordinate only where the sources support that location and disclose unresolved conflicts. The map is an original coordinate schematic.
Does marking a container opened unlock an achievement?
No. A checkmark is your own local reminder. Achievements are awarded by the game. See the crate and note guides for the reported achievement wording and source caveats.
Continue your sweep
Open the interactive map · Find yellow crates · Track notes · Follow the mission guide